Views
A View is a “virtual table” whose contents are defined by a query. Unlike a standard table, a view does not store data itself; instead, it saves a SQL query that runs dynamically whenever you access the view.
Views are powerful tools for simplifying complex data retrieval, aggregating data for reports, or formatting data specifically for frontend consumption without altering the underlying database structure.
Creating a View
Section titled “Creating a View”To create a new view:
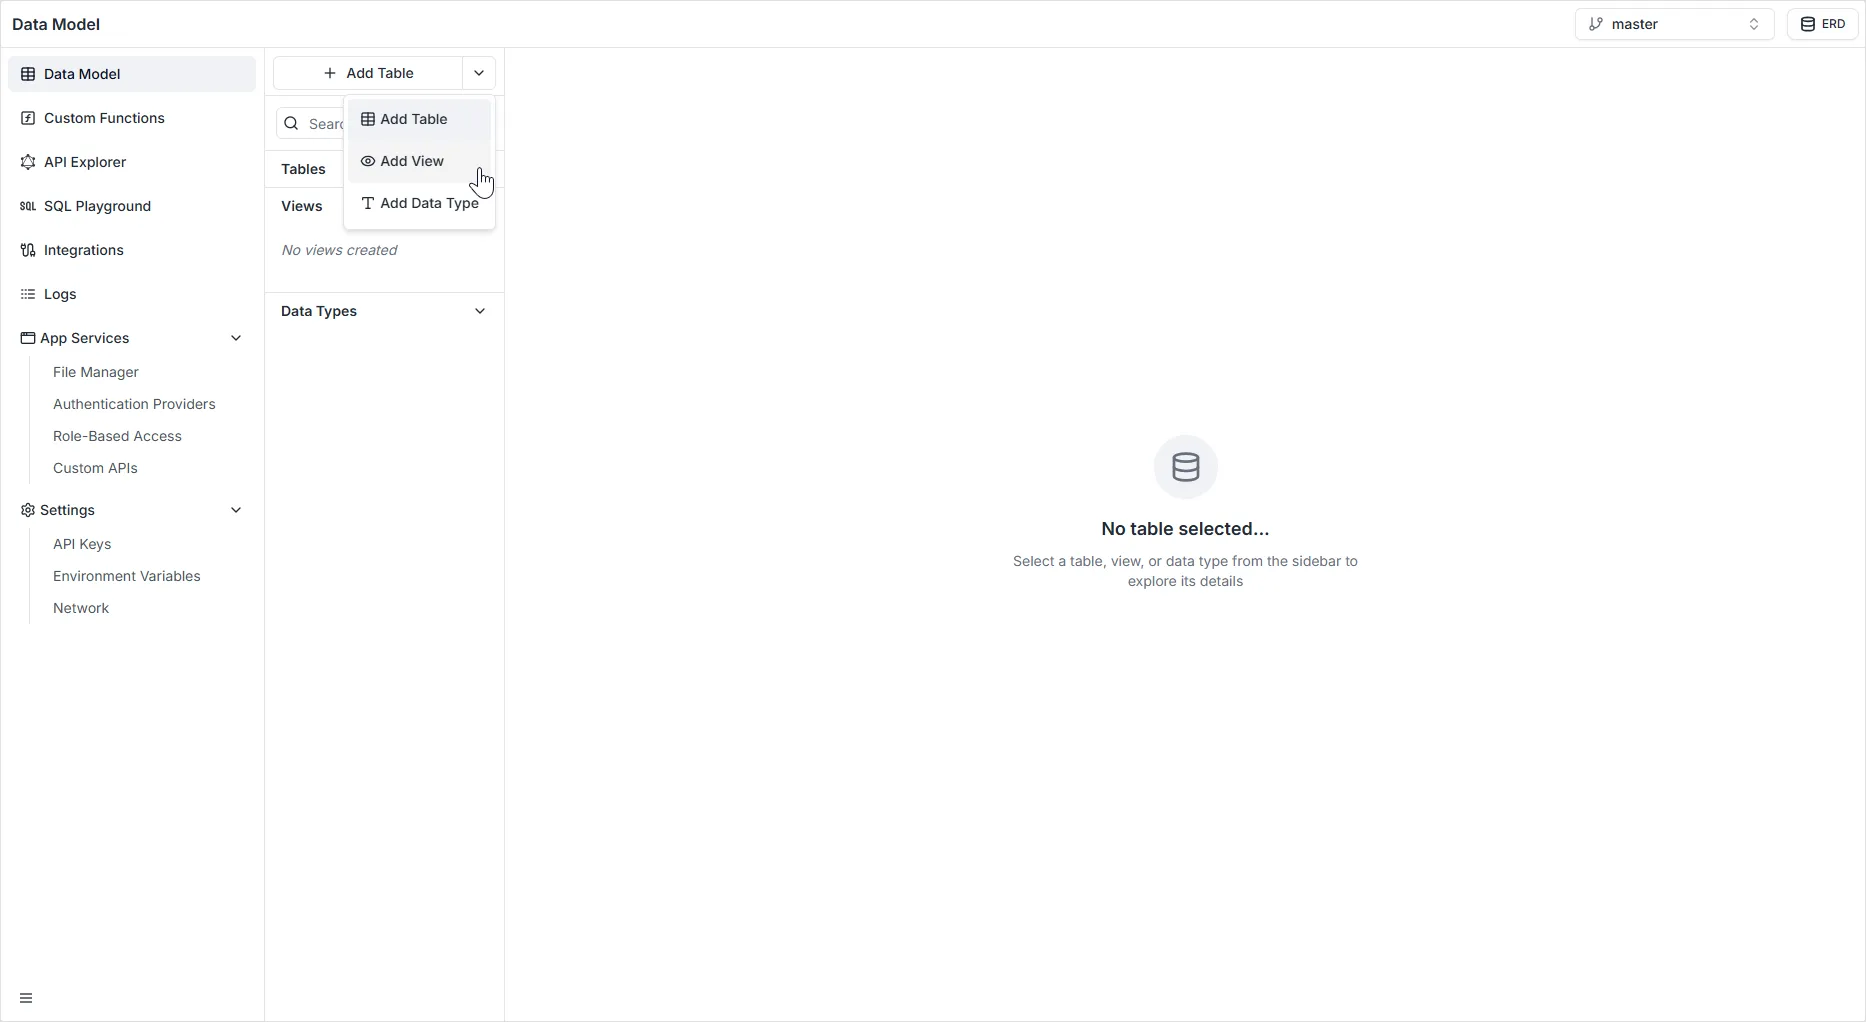
- In the Data Model sidebar, locate the + Add Table button.
- Click the dropdown arrow next to it.
- Select
Add View.
- Write Query: Enter standard SQL
SELECTstatements to define which columns and rows should appear in the view.- Example:
SELECT first_name, email FROM students WHERE is_active = true;
- Example:
- Run/Test: Use the Play button (▶) to execute the query and preview the results immediately in the console. This ensures your syntax is correct before saving.
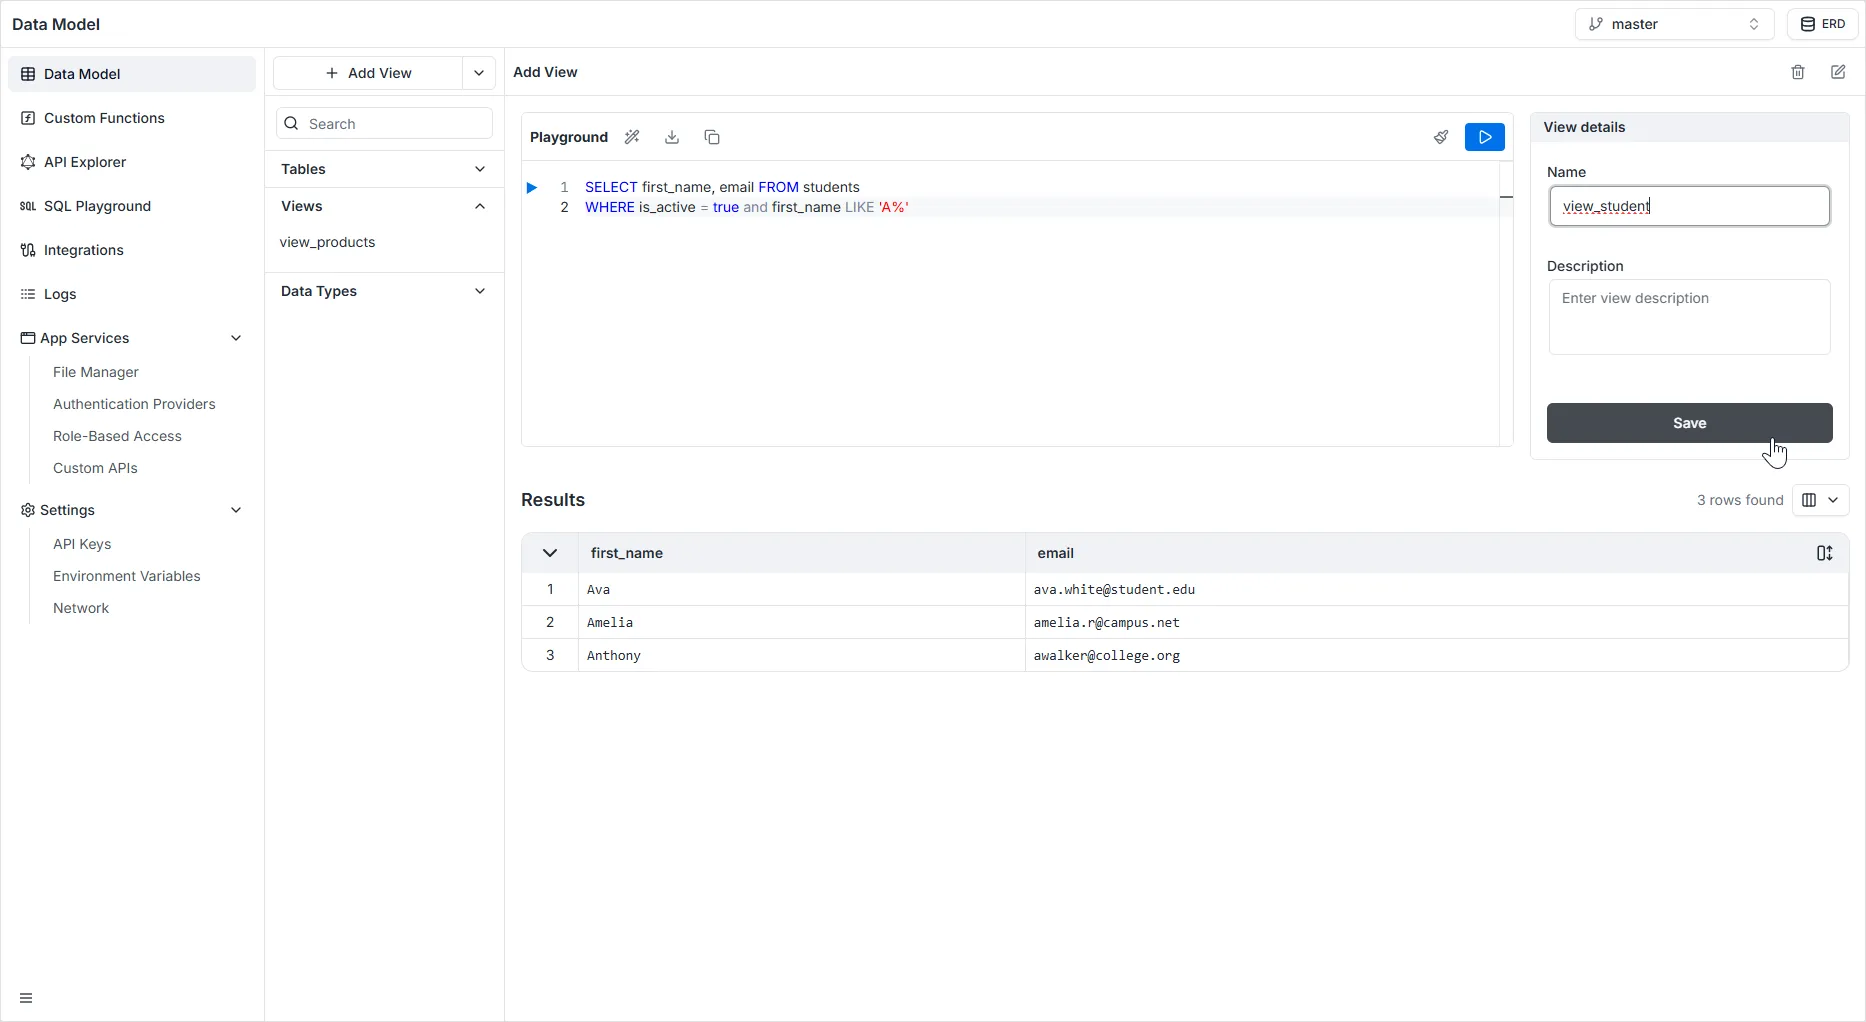
- Write Name: The unique system identifier for the view. This name will be exposed in your API just like a standard table (e.g.,
activeStudents). - Write Description: An optional text area to document the purpose of the complex query for your team.
- Click Save
Updating Views
Section titled “Updating Views”If you need to modify the structure or underlying query of an existing view, you can access its configuration directly from the sidebar menu.
How to Edit a View
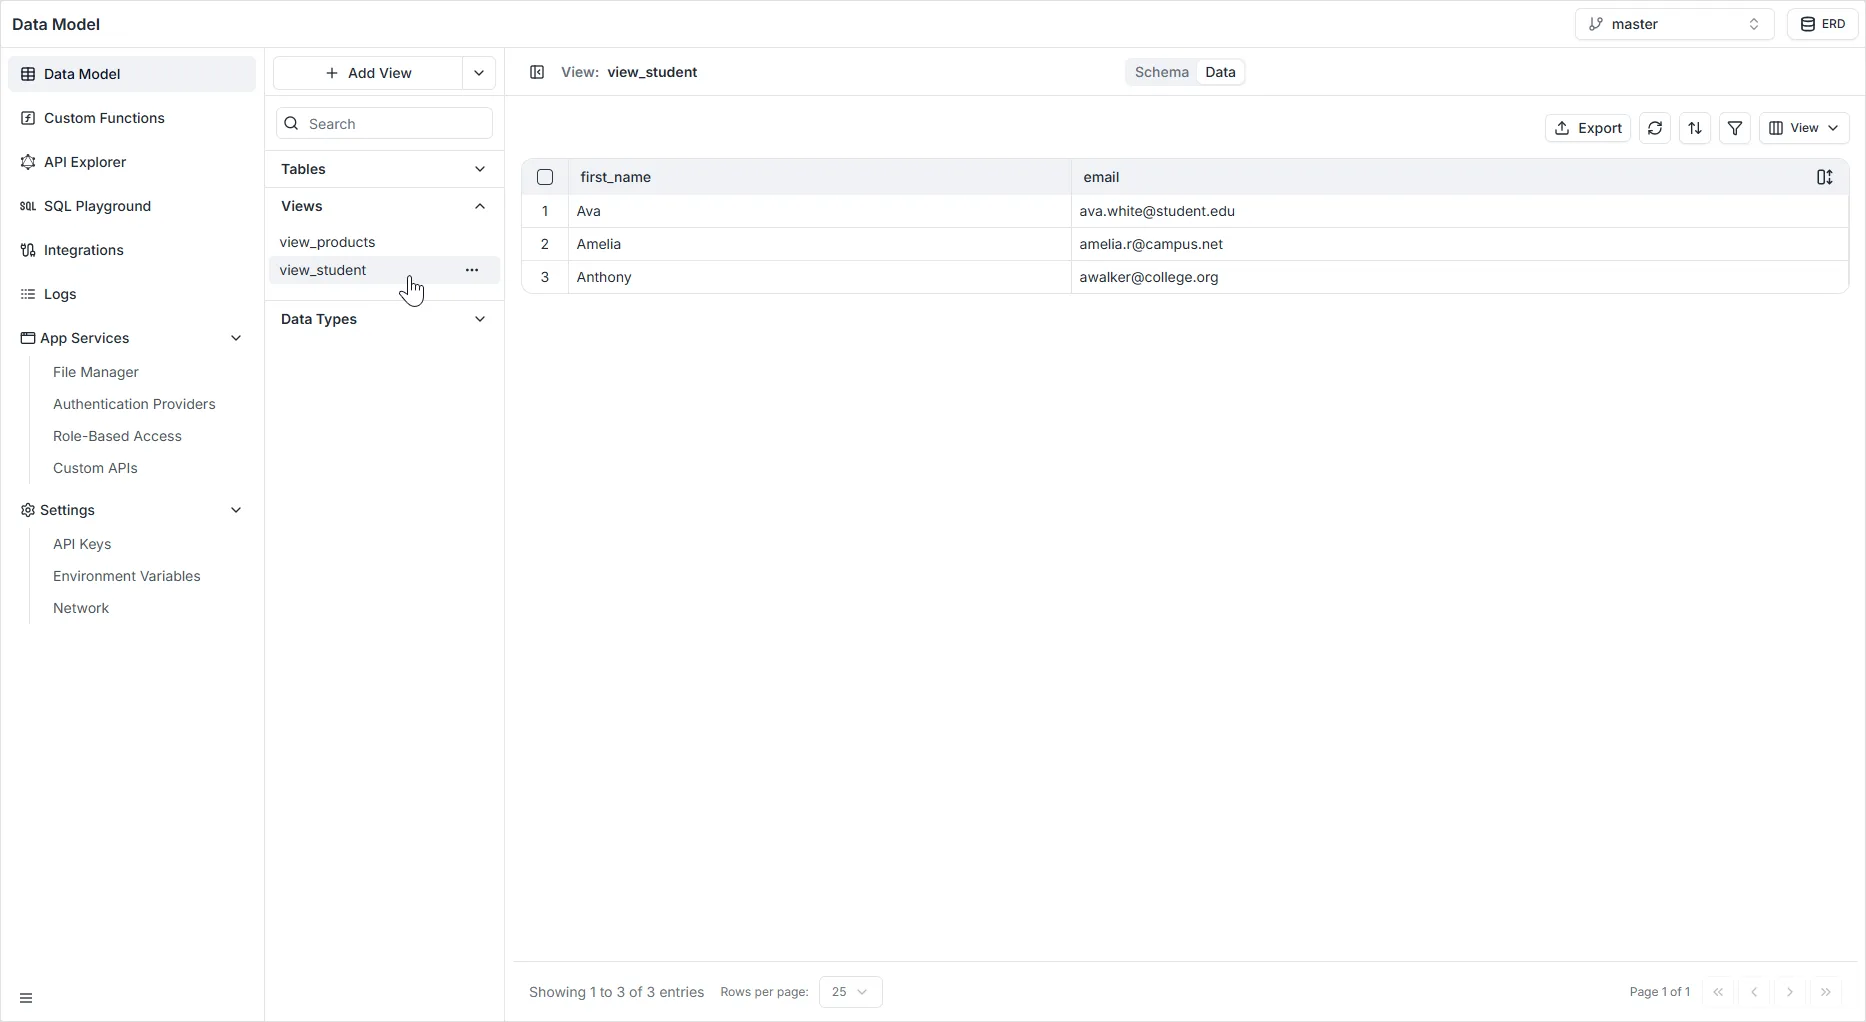
Section titled “How to Edit a View”- Navigate to the Views section in the left-hand Data Model sidebar.
- Locate the specific view you wish to modify (e.g.,
view_student). - Click Edit (the pencil icon) to open the settings and update the view’s query or parameters.
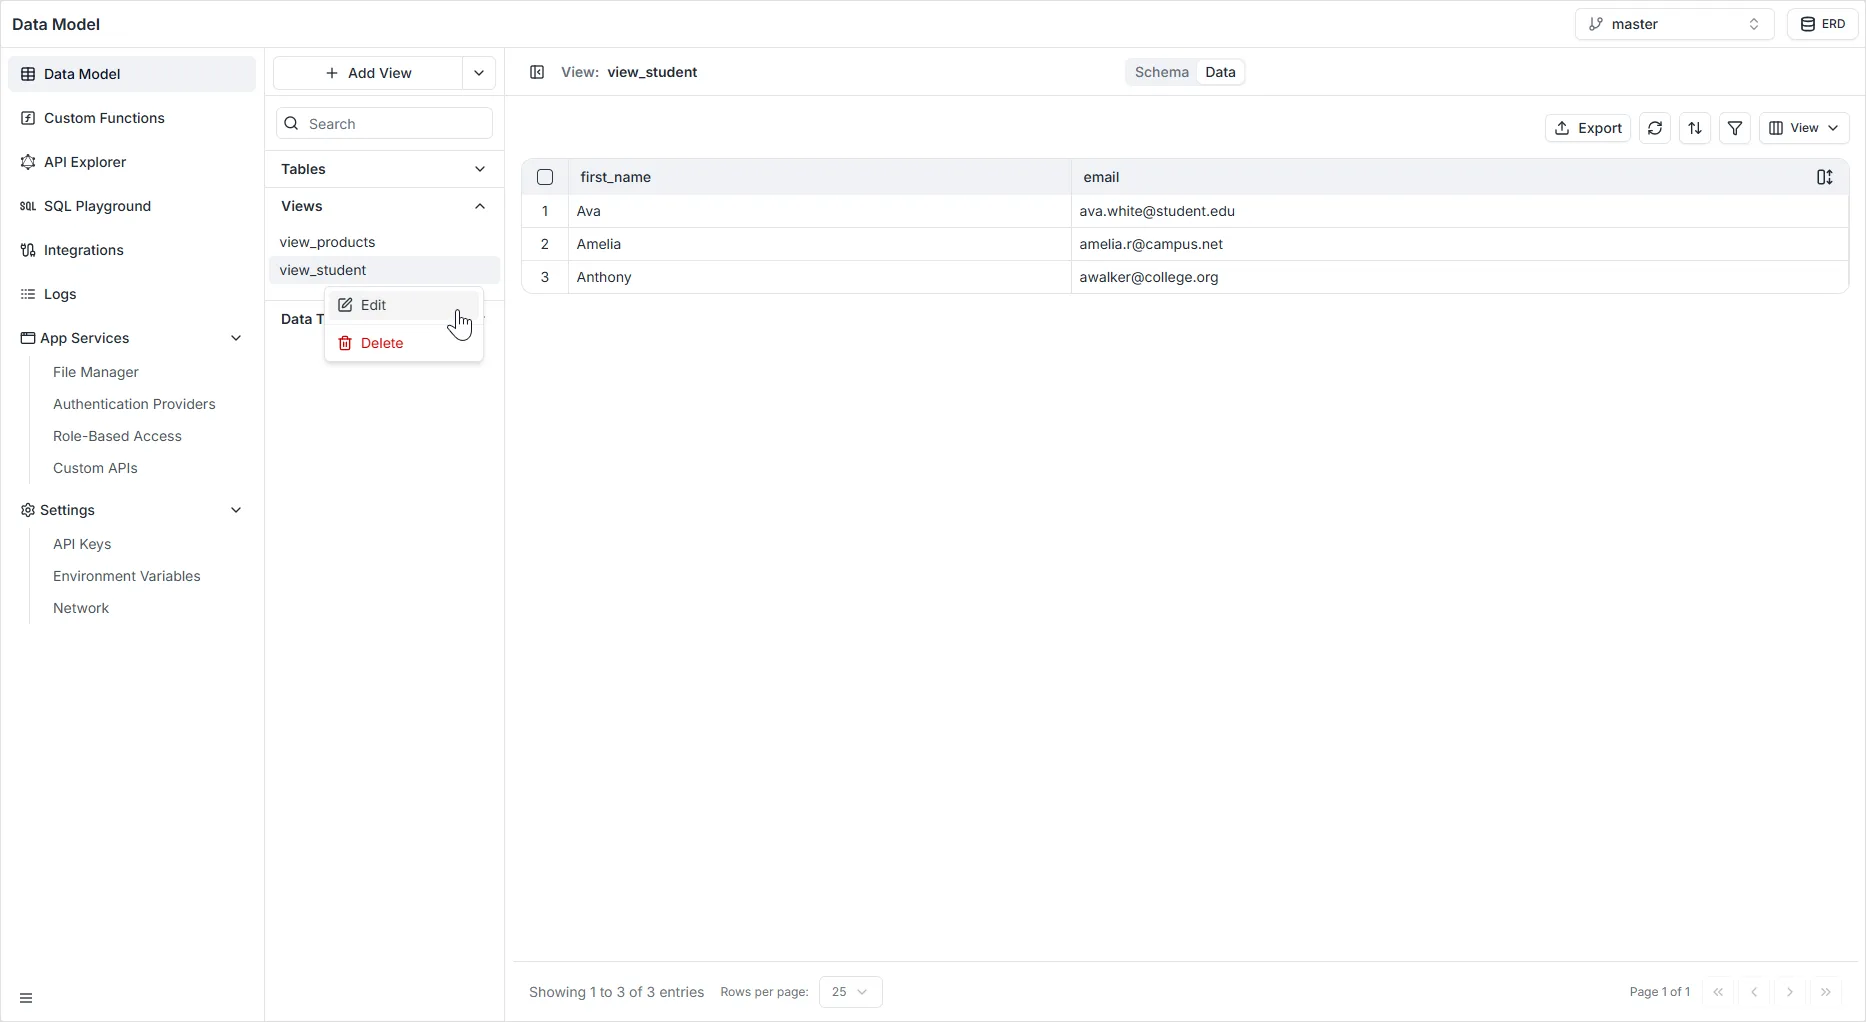
(Note: From this same context menu, you also have the option to permanently Delete the view by clicking the red trash can icon).
Common Use Cases
Section titled “Common Use Cases”- Data Security: Create a view that exposes only public fields (like names) while hiding sensitive ones (like personal IDs or phone numbers) from specific API consumers.
- Simplification: Pre-join multiple related tables (e.g.,
Students+Courses+Grades) into a single virtual table so the frontend can query it easily without complex logic. - Reporting: Use SQL aggregation functions (like
COUNT,AVG,SUM) to create a view that shows live statistics (e.g., “Monthly Sales Total”) automatically.